


In this penultimate installment of the Microsoft in Minutes Tasks Series, we will look at all of the ways that you can create and manage tasks in Microsoft Teams in Microsoft 365. Microsoft Teams is designed to be the central hub on which collaboration and teamwork happens within Microsoft 365. Today, we won't be discussing the calling, meeting, or file sharing features of Teams, but we will discuss some of the capabilities of the Microsoft Teams Chat app and, the Microsoft Teams Teams app, and the Microsoft Teams Planner app. In previous articles, we discussed how to manage tasks generated from Microsoft Outlook, how to create project plans using Microsoft Planner, and how to create tasks while taking notes in Microsoft OneNote. Today is all about tasks in Microsoft Teams.
Understanding the Microsoft Teams Planner app
To get started today, let's look at the Planner app in Microsoft Teams. Microsoft just released a new and improved app called Planner that replaces the Tasks by Planner and To Do app. The last time we looked at Microsoft Planner, we focused on creating standalone plans. In this article, we'll look at how to create a team plan as well as some of the unique features that the Microsoft Teams Planner app provides.
The Planner app within Microsoft Teams is the closest thing we have to a desktop version of Microsoft Planner. It allows you to create and manage plans, tasks, and assignments from within Microsoft Teams. The Planner app is integrated with Microsoft Planner so any plan you create in the Microsoft Teams Planner app is available in Microsoft Planner (both web and mobile), too. The Planner app in Teams also has some additional features which allow you to view tasks across all your plans in a single Tasks list and create tasks from chat messages, posts, and post replies.
Finding the Planner app in Microsoft Teams
Just like all apps within Microsoft Teams, Planner appears in the application bar on the left side of the Microsoft Teams window; however, it isn't visible by default.
To use Planner, we need to add it to the application bar.
- To show all available applications, in the application bar,
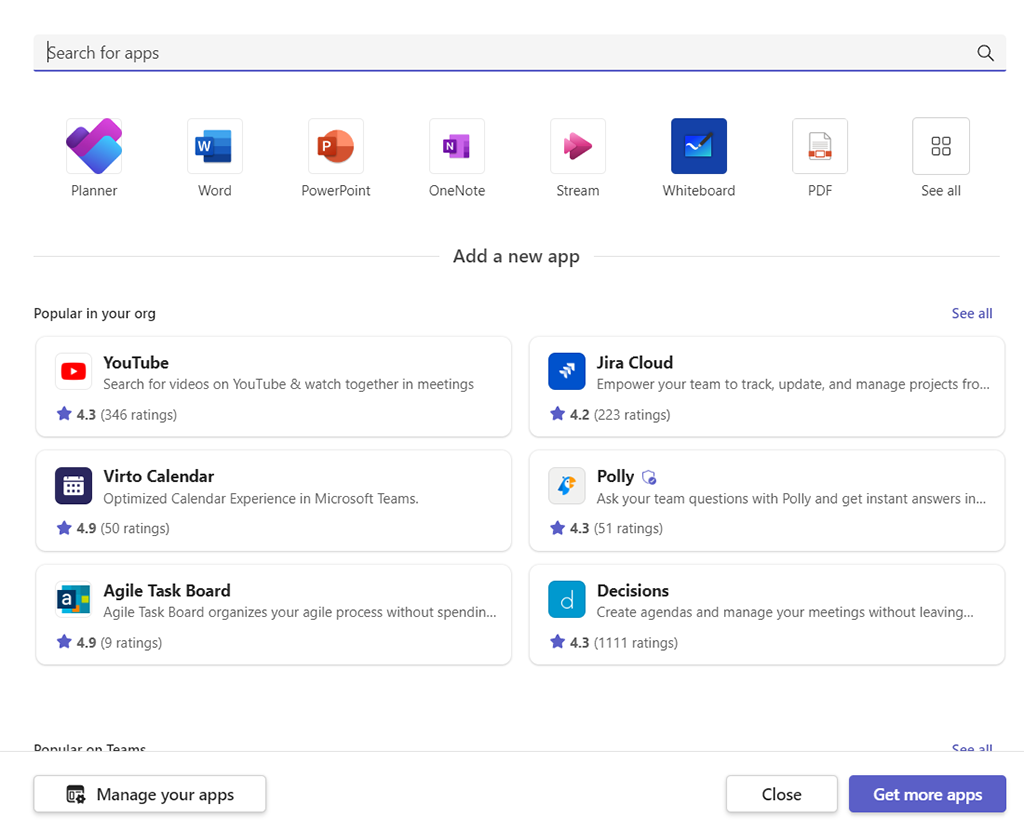
Click the View more apps button (…)
A flyout will appear showing the apps available for you to add to the Microsoft Teams application bar:
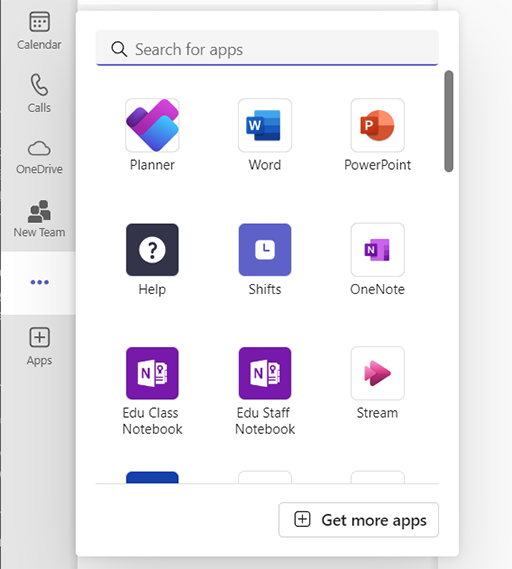
In a lot of cases, the Planner application will be visible here by default. If it isn't, you can search using the search bar at the top of the flyout. To make sure the Planner app is always available in our application bar, let's pin it.
- To pin the Planner app to the application bar, in the flyout,
Right-click the Planner icon, Click Pin
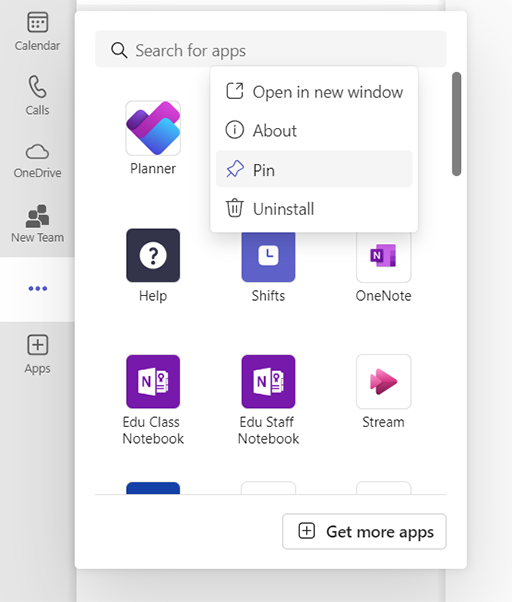
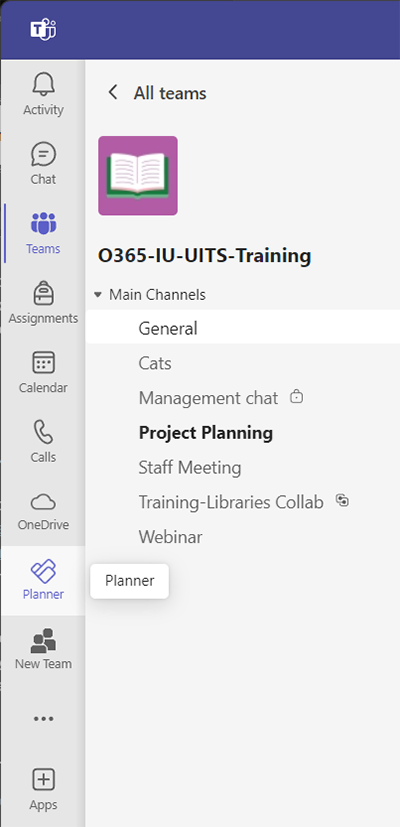
Planner will now always be visible in your Microsoft Teams application bar.
NOTE: You do not have to pin the Planner app to the Microsoft Teams application bar to use Planner.
Using the Planner app
Now that we have Planner in our application bar, let's look at the app.
- To open the Planner app, in the application bar,
Click Planner
The Planner app loads within Microsoft Teams:
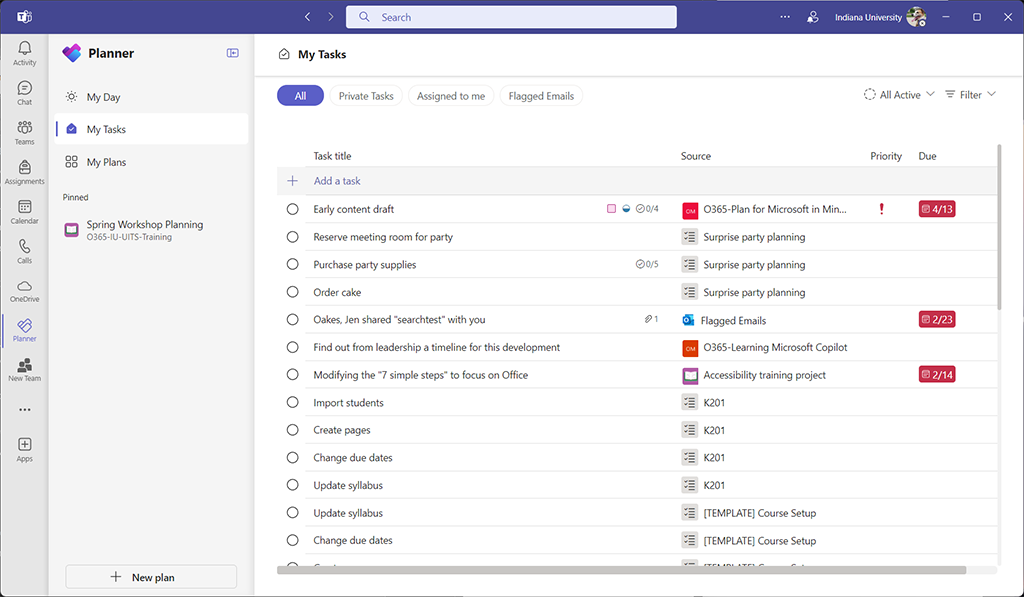
By default, we're dropped in a task list view showing all our tasks in Microsoft 365. This view is also available via the To Do app (both the standalone version we'll cover in the next article and the Microsoft Outlook version we discussed previously); however, this view doesn't exist in the web version of Microsoft Planner. The Tasks view simply shows you all the tasks you've created or that have been assigned to you in Microsoft 365.
You can filter these tasks using the filtering options at the top of the app:

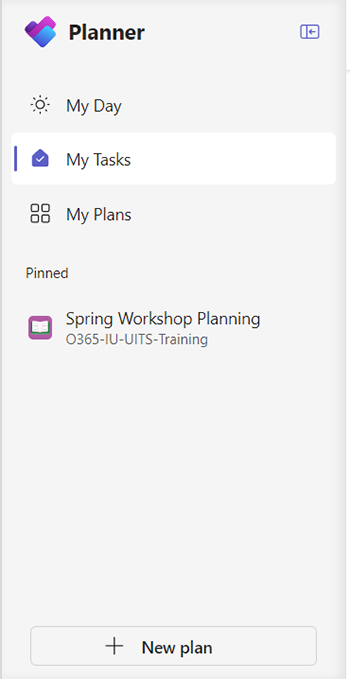
In the left navigation, you can see your task lists (including the My Day view that we will discuss in the next article about Microsoft To Do), all your plans, and a button to create a new plan:
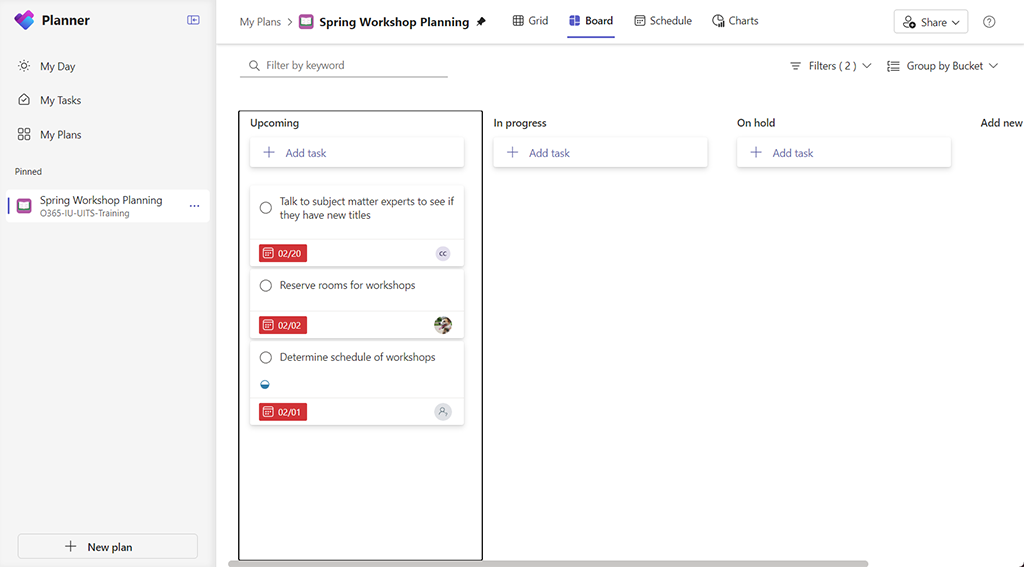
If you select one of your plans, you can use the plan just like you could within Microsoft Planner:
So far, everything we've seen in the Planner app are things we've discussed in previous articles in this series. Now, let's look at some of the things that the Planner app lets us do in Microsoft Teams.
Creating a team plan from the Microsoft Teams Planner app
In Using Microsoft Planner for group project management we discussed how to create a standalone plan and mentioned that you could assign a plan to a team from within Microsoft Planner on the web but didn't discuss how. The main reason that we didn't discuss it in that article is that the experience is clunky compared to accomplishing the same task using the Microsoft Teams. We'll look at both methods in this article, starting with creating a plan for a team from the Planner app.
Let's create a plan for a team within the Planner app.
- To begin creating a new plan, in the Planner sidebar,
Click the New plan button
The New Plan wizard appears:
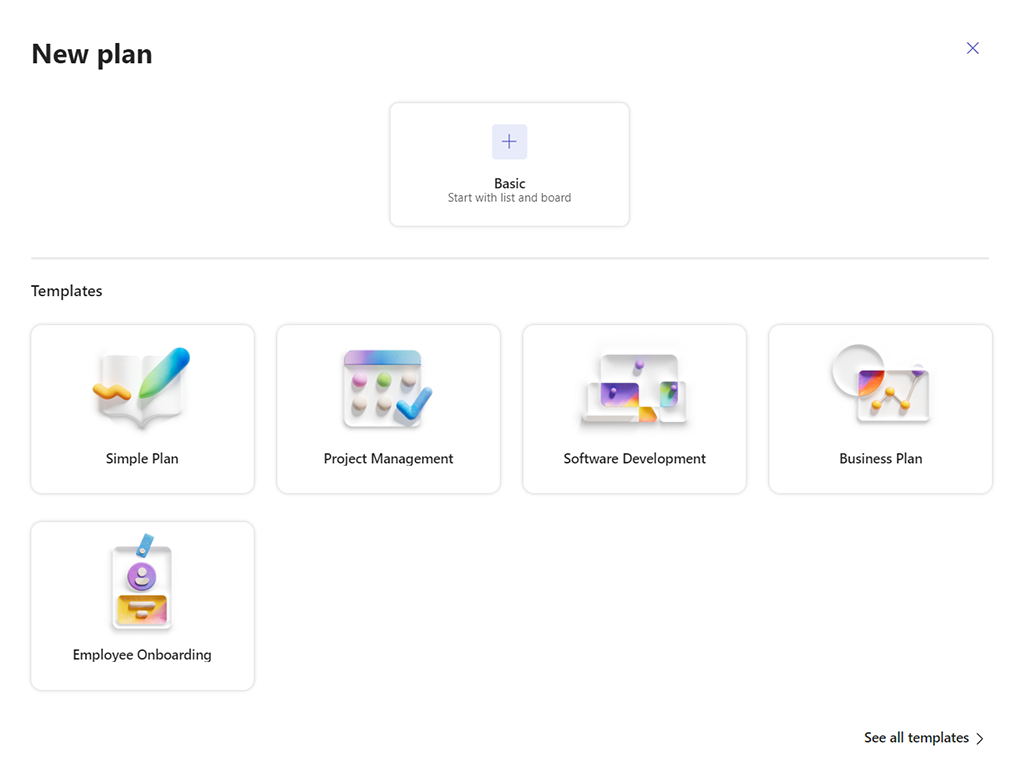
This view is like the view we saw when we created a new plan in the Planner web application. From here, we can select a plan template, browse for more templates, or create a simple plan.
- To select a template,
Click the template you choose
The next screen allows you to give your plan a name and assign it to a group. You can create a standalone plan here by not including a group, but since we want to assign this plan to a team, let's select a group here.
- To give the plan a name, in the Name field, type:
a name for the plan
NOTE: You can optionally add the plan to your pinned plans by checking the "Add to my pinned plans" check box.
- To assign the plan to a team, in the Add a group dropdown menu,
Click the name of the assigned team - To create the plan,
Click the Create button
The new plan loads within the Planner app in Microsoft Teams. From here, you can fill out the new plan following the instructions in Using Microsoft Planner for group project management. The difference between creating a standalone plan and the way we created a plan here is that we've granted all team members access to the plan via the Planner app. To use the plan, our team members need to know how to use the Planner app either in Microsoft Teams or from the web/mobile Microsoft Planner app.
Adding a plan to a channel
We can also add a plan directly to a standard channel as a tab. The plan tab will exist alongside the channel's Posts and Files tabs within the Microsoft Teams Teams app. Adding a plan as a tab on a channel allows users to find the applicable plans more easily when they're on a channel to collaborate, find files, attend meetings, etc.
NOTE: When this article was written, adding a plan to a private or shared channel is not possible using the method described in this section. You can add a link to a plan as a tab in a private or shared channel, but you cannot directly integrate the planner capabilities in non-standard channels.
- To navigate to a channel within a team, in the application bar,
Click the Teams app and navigate to the channel where you'd like to add the plan
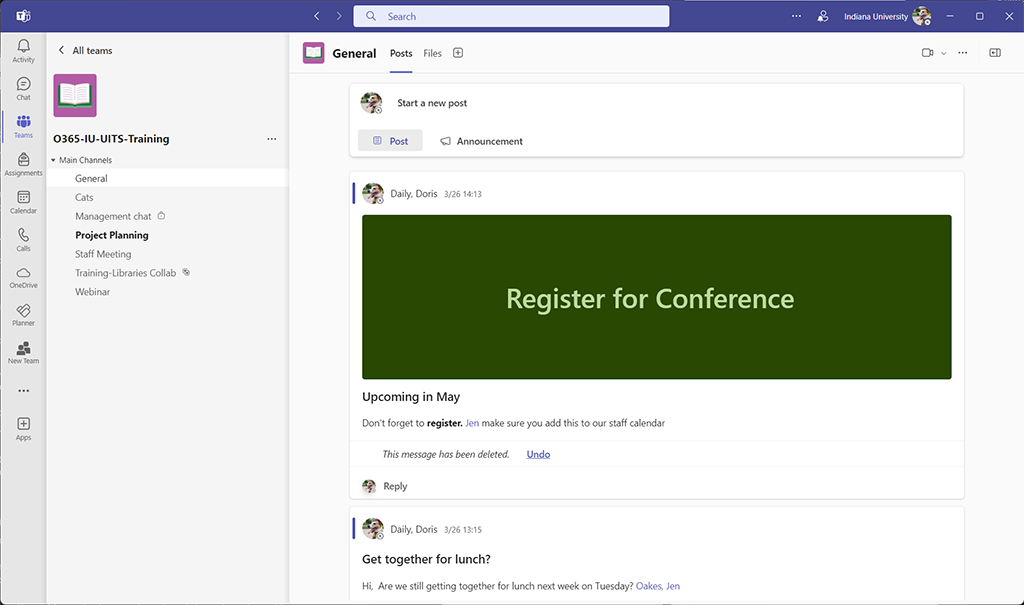
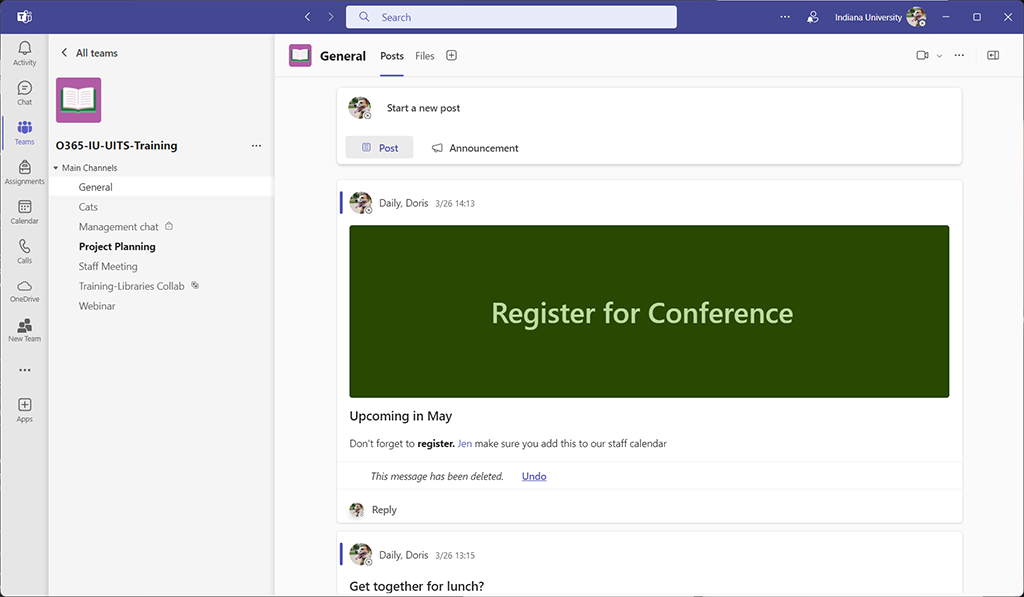
In my example, I'm going to add the plan to the General tab of the team O365-IU-UITS-Training.
- To add a plan to a channel, at the top of the Teams app, in the tab bar,
Click the + button
The add a tab dialog box appears:
- To add a plan, in the dialog box,
Click Planner
The Planner tab configuration dialog box appears:
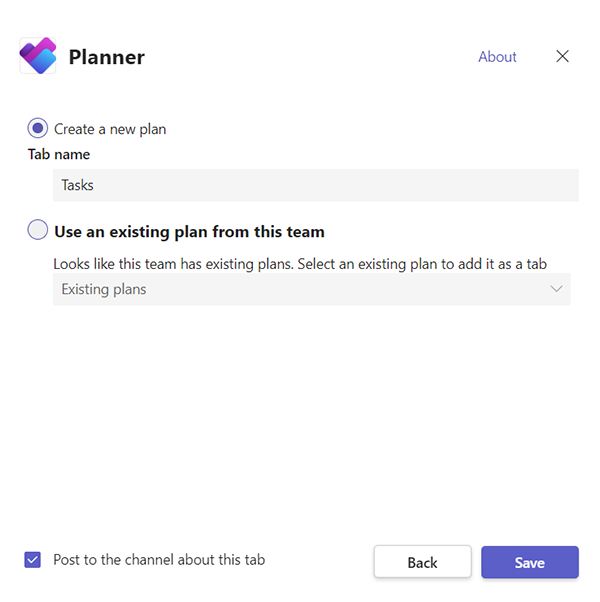
From here, we can either create a new plan and add it as a tab to this channel or select an existing plan from this team and add it as a tab. Since we just created a plan within this team, let's select an existing plan.
- In the Planner tab configuration dialog box,
Click the Use an existing plan from this team radio button, select the plan from the drop-down list.
You can optionally post about the plan in the channel. This is selected by default, so if you don't want to create a post announcing the new tab, simply uncheck the checkbox.
- To add the tab,
Click Save
Our new plan is now added to the tab bar at the top of our channel and is selected by default:

All of the other capabilities of the Planner app are described in Using Microsoft Planner for group project management. Now that we've seen the Planner app, learned how to add a plan to a team, and added a plan as a tab to a channel, let's explore the task creation features of Microsoft Teams provided by the Planner app.
Creating tasks within Microsoft Teams
There are three ways that you can directly create tasks within Microsoft Teams. The first is by using the Planner app, which we've just explored. The second is by creating a task directly from a post or post reply in a channel. The third is by creating a task directly from a message in the Microsoft Teams Chat app. Since we're already in a channel, let's look at how to create a task directly from a conversation post or a reply in a channel.
Making a task from a post or a post reply in the Posts tab of a team channel
Oftentimes, when you're having a real-time conversation with team members, your conversation will generate action items or things you'd like to remember to do later. When those situations arise, you can create a task directly from the conversation post or from one of the replies. These tasks are individual tasks on one of your to do lists or groups tasks added to a plan. You can make a task from any post or post reply, whether it is sent by you or someone else.
Let's take a look at how to create a task from a post or reply in a conversation in the Microsoft Teams Teams app.
- To start making a task from a post or a reply, first,
Find the post or post reply in the team channel - To show the post or reply options for any post or reply,
Point to the post or reply
The post or reply options will appear in the upper right corner of the post or reply:

This is where you can add a reaction to a message or edit a message you created. You can also directly create a task from here.
- To expand the More options menu, in the post or reply options bar,
Click the More options button (…)
The more options context menu appears:
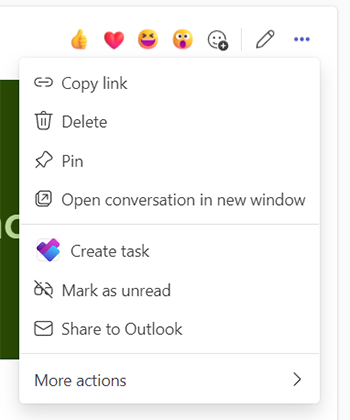
There are many things that you can do from here, but the option we're most interested in is the Create task option.
- To create a task,
Click Create task
The Create task dialog appears:
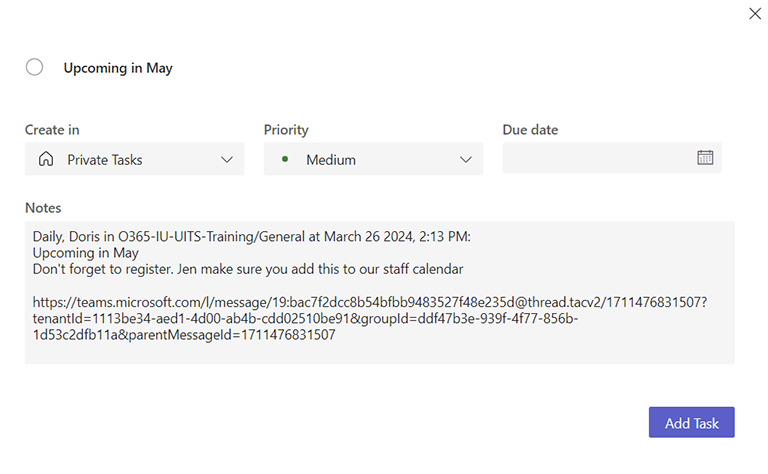
You can change any values here, but you'll notice that in the Notes field, there's a link directly to the conversation post or reply that you can follow from either Outlook, To Do, or the Microsoft Teams Planner app to jump directly to the context that created the task. For example, you can change the name of the task to be more descriptive, add it to one of your to do lists or to a plan, set the task's priority, or set a due date for the task from here.
- To finish creating the task,
Click Add Task
The task will get created and added to the list or plan you selected in the Create in field. We will learn more about how to edit, organize, and manage tasks on your individual task list in the next article about using Microsoft To Do. For now, let's look at how to create a task from a message in the Chat app.
Making a task from a chat message in the Chat app
The third way to create tasks in Teams is to make a task from a message in the Chat app. Just like creating a task from a post or reply in a conversation, this is useful when you want to quickly capture an action item or a reminder from a 1:1 or group chat.
The process here is similar to creating a task from a post or reply to a conversation in a channel. First, we have to navigate away from the Teams app and into the Chat app.
- To navigate to the Chat app, in the application bar,
Click the Chat app
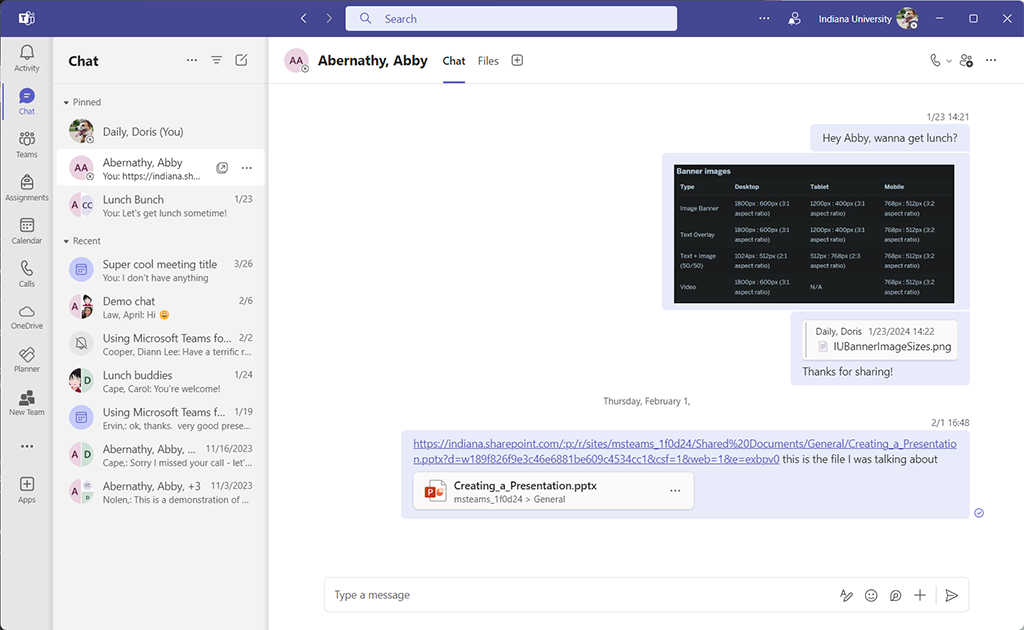
The Microsoft Teams Chat app appears:
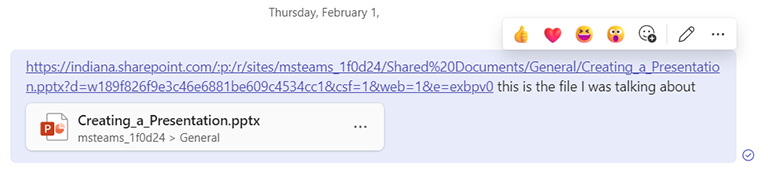
- To show the message options for any message,
Point to the message
The message options will appear in the upper right corner of the post or reply:
- To expand the More options menu, in the message options bar,
Click the More options button (…)
The more options context menu appears:
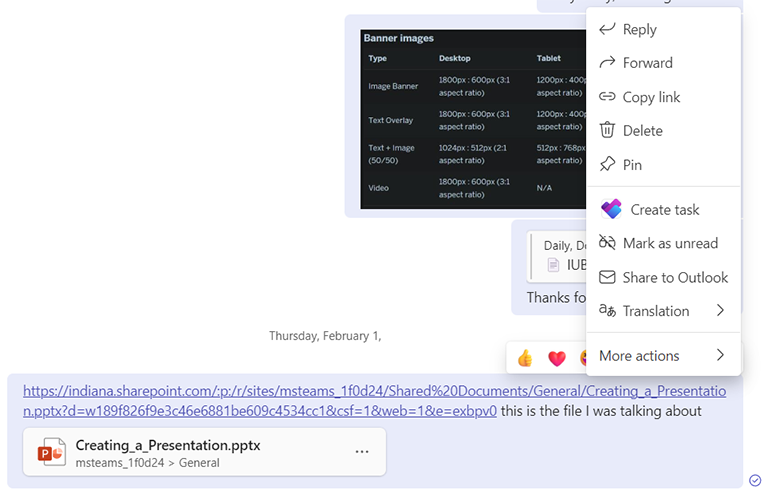
There are more options in this menu for a chat than there are for a post or reply, but just like for a post or reply to a conversation, the option we're most interested in is the Create task option.
- To create a task,
Click Create task
The Create task dialog appears:
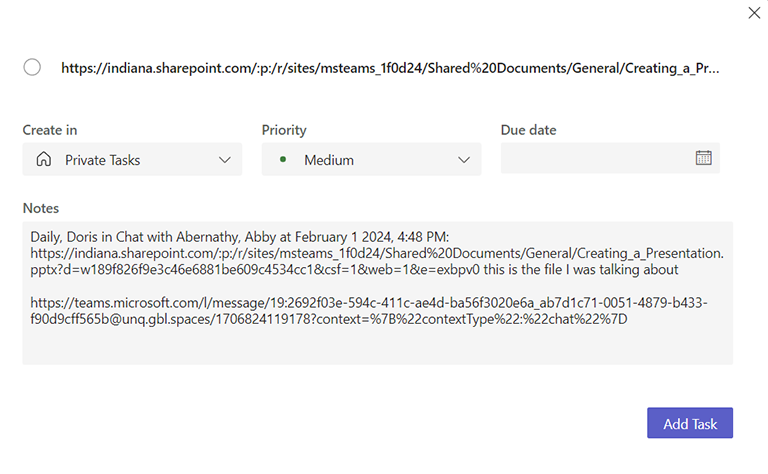
Just like before, you can change any of the options here, but in this case, I'd recommend at least changing the name of the task. When you create tasks from posts, replies, or messages, the name of the task defaults to the content of the message. A lot of times, that's not helpful, but having the link directly to the post, reply, or conversation in context is incredibly helpful.
That wraps up the task creation and management tools available in Microsoft Teams. This article was primarily focused on creating plans, making those plans easily accessible to team members, and creating tasks from posts, replies, and messages. We discussed how to manage tasks in Planner and in Outlook previously.
In the last article of the series, we will see how all of these tools come together to create a comprehensive individual and team task management system within Microsoft 365.
Let's recap what we've done so far:
- We've looked at the Microsoft 365 task system as a whole in An Introduction to Microsoft 365 Tasks.
- We looked at ways to help you keep track of important tasks from your email using email flagging, due dates, and reminders in Outlook and Microsoft To Do in Using Microsoft Outlook for task management.
- We explored the basic skills you need to use Microsoft Planner to manage group projects efficiently and effectively in Using Microsoft Planner for group project management.
- This article: We looked at how to power up your individual and team notetaking using Microsoft OneNote so you never lose track of a meeting action item again in Taking meeting notes and creating tasks using Microsoft OneNote.
- We will explore the tools available in Microsoft Teams to create and manage tasks, including the new Microsoft Teams Planner app in Managing and creating Tasks in Microsoft Teams and the new Planner app.
In the final article of this series on task management:
- We will put all the skills we've learned together and look at how to use the Microsoft To Do application to organize and plan your individual tasks—including a look into how I use these tools on a daily basis—in "Putting it all together to organize your daily workflow with Microsoft To Do".