


This article is a follow-up to our previous article An Introduction to Microsoft 365 Tasks, where we gave an overview of the tasks system and the various applications that interact with it. If you haven't read that article yet, we recommend you do so before continuing with this one.
Outlook is more than just an email application. It's also a powerful tool for managing your tasks, setting reminders, and staying organized. In this article, we'll look at how to use Outlook's built-in task management tools. Specifically, we'll look at how to use email flagging to never forget to follow up on a message including how to set a reminder, due date, subtasks, and importance on a flagged message.
NOTE: all screenshots in this article are taken using Outlook on the Web. You can access Outlook on the web at IU by visiting https://mail.iu.edu. All the features discussed in this article are available on both Outlook and New Outlook for desktop as well as from the Outlook mobile application unless otherwise noted.
Email flagging
One of the easiest ways to create a task in Outlook is to flag an email for follow-up. Flagging an email adds it to the Flagged Emails list in the To Do app and lets you set a due date and a reminder for it.
Why use email flagging?
Before we get into the specifics of using email flagging, let's briefly answer a common question I get when I introduce this topic in a training session: Why should I use email flagging? There are several benefits to flagging emails:
- Never lose track of a message that requires a response.
- Add additional notes regarding responding to an email in the flagged email's task.
- Set a due date for when you need to reply.
- Set a separate reminder ahead of a due date to remind you that you need to respond to a particular message.
- Add the email as a task in your normal tasks workflow within Microsoft 365.
- When the email task is completed, you can remove the message from your inbox and into your email archive to help you stay more focused and reduce the overwhelming feeling of having thousands of messages looking at you in your inbox.
Email flagging is more than just adding an icon and highlighting a message in the Outlook message list; it's an efficient way to turn a message into a task, create a plan to accomplish the task, give yourself a due date, set a reminder, and take notes. In short, email flagging is a tool to help you stay on track when using Microsoft Outlook.
How to flag messages
There are essentially two different ways that you can flag a message, with a due date and without a due date. There are a few different ways that you can flag a message both with and without a due date:
Flagging with no due date
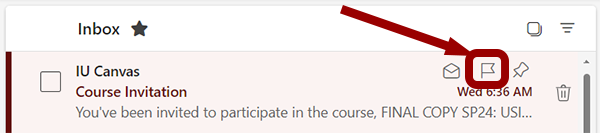
Perhaps the quickest way to flag an email in Outlook for the web and the Outlook desktop clients is to point to the message and click the flag icon next to the email in your inbox.
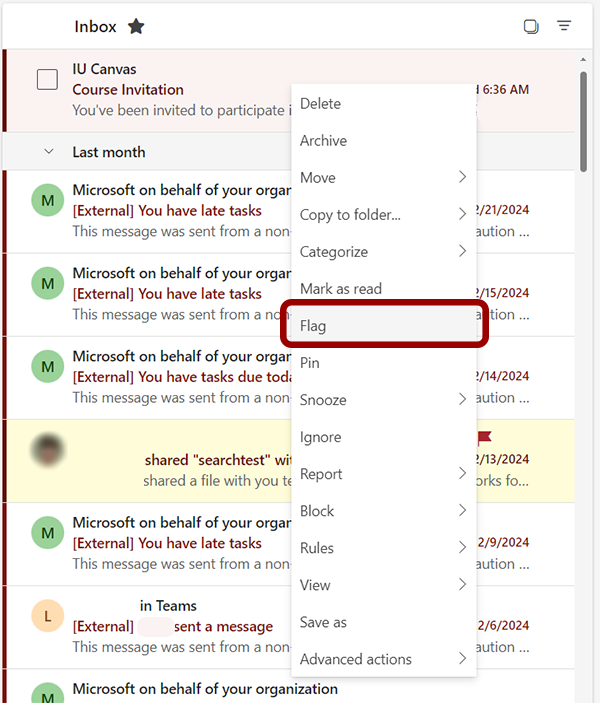
You can also right-click the message and select the Flag option from the context menu.
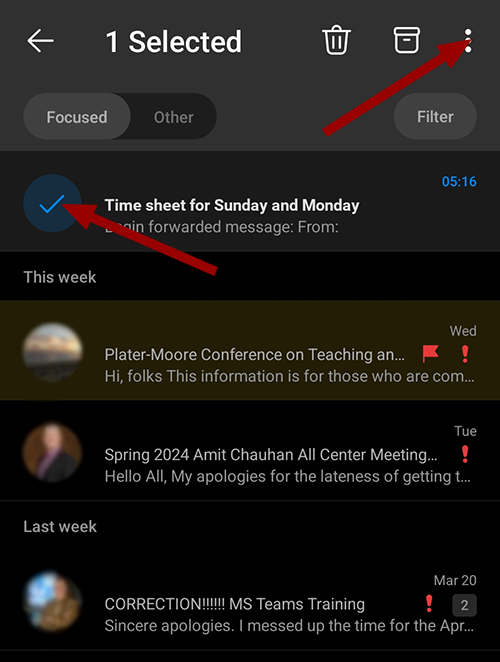
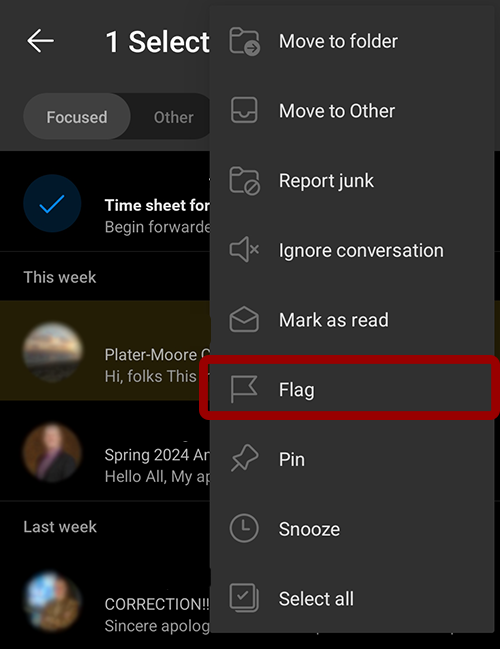
On Outlook Mobile, simply tap the sender's profile photo to select the message, then tap the three vertical dots menu and choose Flag.
All these methods accomplish the same goal, creating a task without a due date in the Flagged Email list within To Do.
Flagging with a due date
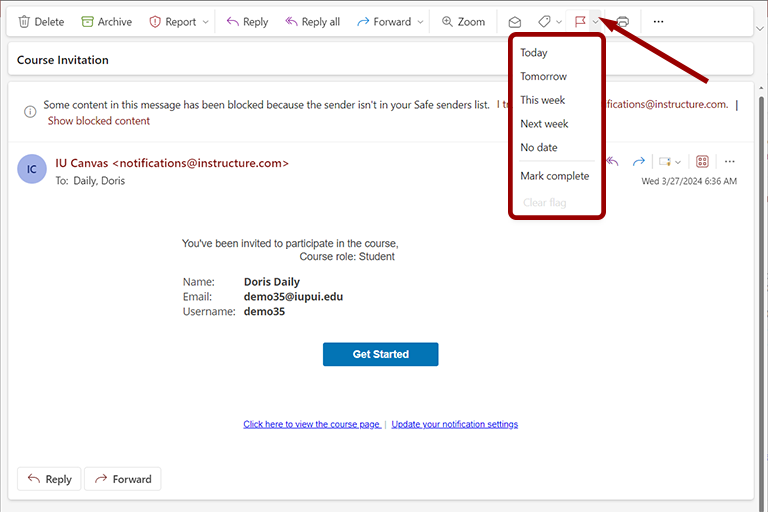
You can also flag a message for follow up with a specific due date using Outlook for the web and the Outlook desktop clients. This opens a context menu that has several built-in options such as tomorrow, today, next week, etc., but also lets you set a custom due date.
First, select the message in the inbox, then click the downward-pointing arrow on the Flag button to reveal the due date options:

NOTE: You don't need to have the preview pane visible to set a due date using the Flag button in the ribbon. You just have to select the message in the inbox.
You can also flag an email that is open in a separate window from the message window's ribbon. The same options are available here as are available in the main Outlook ribbon.
Once a message is flagged, it will show up in the To Do application.
The built-in To Do app
The To Do app is the central app for managing your tasks in Microsoft 365. It collects all the tasks that you create or are assigned to you from various sources, such as Outlook, Teams, OneNote, or Planner. We will dive into the To Do application in more depth in an upcoming article, but for today, we'll discuss how you can manage and work with flagged items in To Do via Outlook.
You can access the To Do app from within Outlook by clicking on the To Do icon in the application bar:
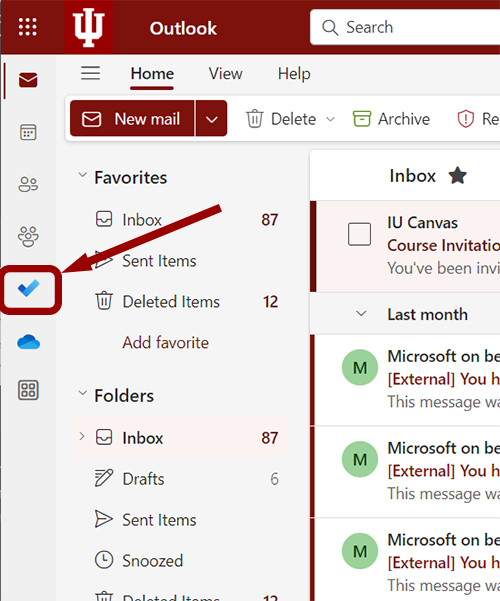
The To Do application loads within Outlook to the default view:
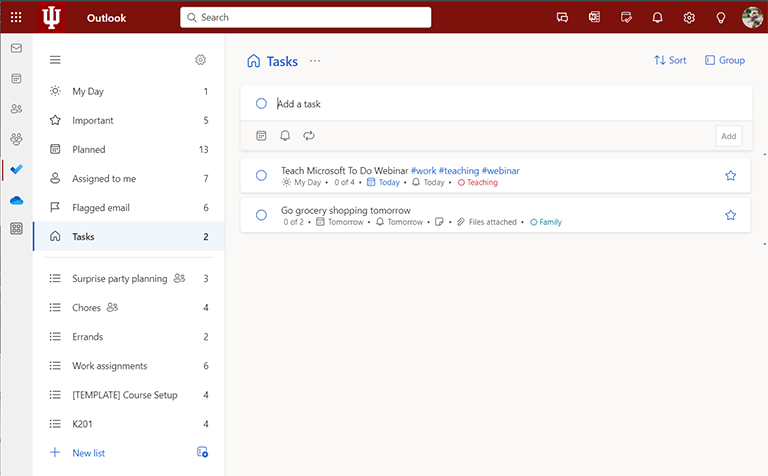
In the To Do app, you can see all your flagged emails in the Flagged Email list. To view your flagged emails, simply click the Flagged email list in the left navigation:
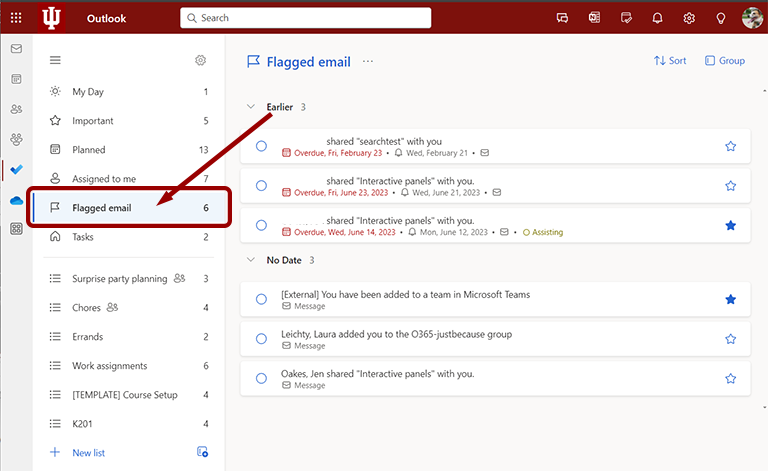
From here, by selecting a flagged email task, you can add subtasks, notes, attachments, and comments to your tasks, as well as change their due dates, reminders, and names. To select a task, simply click the task:
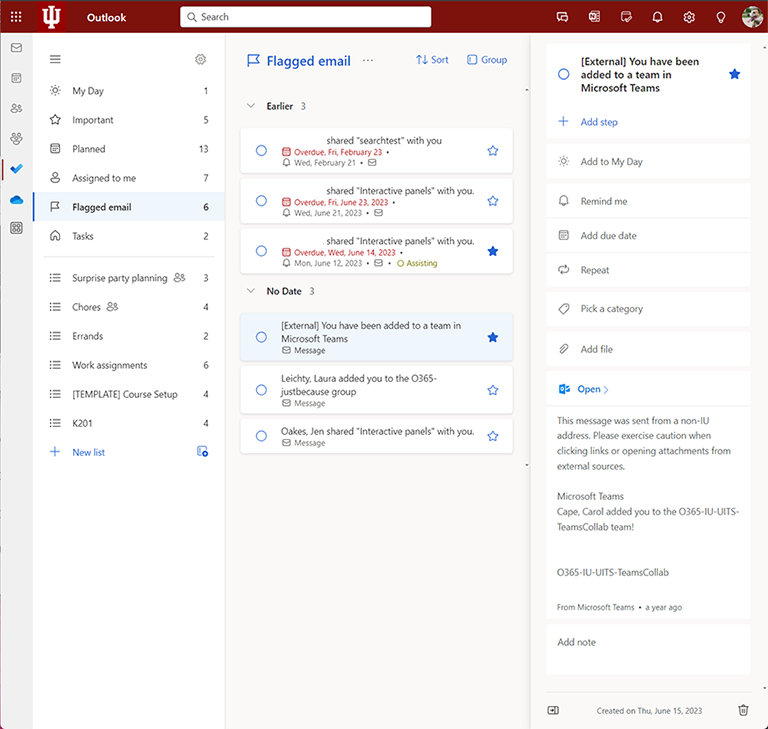
When you have a task selected, the task details pane appears to the right of the interface. From here, you can:
- Change the task name by clicking on the name of the task.
- Mark a task as important by clicking the star.
- Add subtasks by clicking "Add step."
- Add the email to your My Day list by clicking "Add to My Day" (we will discuss the My Day list in detail when we discuss the To Do app as a standalone tool in an upcoming article).
- Set a reminder for the task by clicking "Remind me" (reminders for tasks appear in the Outlook reminder window just like a meeting reminder).
- Set a due date for the task by clicking "Add due date."
- If the task is a recurring task, you can set up recurrence by clicking the "Repeat" option.
- Categorize the task based on your Outlook categories by clicking "Pick a category."
- Add an attachment to the task by clicking "Add file."
- Open the source message in Outlook by clicking "Open" in the task description field. By default this shows the message contents.
- Modify the details of the task to add additional information not present in the initial email message by clicking on the contents of the message details field.
- Add any additional notes by clicking in the "Add note" field.
Outlook and the built-in To Do app are powerful tools for email-based task management in Microsoft 365. By using email flagging and the built-in To Do app, you can create and manage your tasks based on your emails, set due dates, reminders, and recurrence, categorize tasks, add subtasks and files, and make any notes you need to help you complete the task associated with the message. This is especially helpful when a message requesting action arrives but the action required isn't due for weeks or months. The robust options available for each flagged email in the To Do app helps you never miss an email-related task again.
In the next article in this series, we will show you how to use Planner to manage tasks for more complex projects.