Today, we're going to look at a little-known Microsoft Outlook feature called a Scheduling Poll.
NOTE: Microsoft's official name for this feature is "Scheduling Polls;" however, the desktop versions of Microsoft Outlook on Windows and macOS use an inconsistent naming scheme. Sometimes you'll see the names "FindTime," "Meeting Poll," "FindTime Meeting Poll," or "FindTime Scheduling Poll" to refer to the same feature. This can be confusing so throughout this article, I will use "Scheduling Polls" to refer to the feature and refer to interface objects (buttons, sidebars, etc.) by their names in the Windows version of Microsoft Outlook 365. If you're using the macOS version or Outlook for Web, the naming may be slightly different.
Imagine one of these scenarios:
- As a faculty member, you're scheduling a large (more than two hundred people) departmental meeting but would like to get an idea of when to hold the meeting based off people's current availability during a particular week of the year.
- As a staff member or researcher, you're scheduling a meeting with many IU and non-IU attendees and can't see the calendars of the non-IU attendees but would like to schedule when they're available.
- As a student, you have a group project, and you'd like to get everyone together but don't have time for the email back-and-forth and not all your teammates use their Outlook Calendar to keep track of their schedule.
Normally, this process would start with an email to everyone involved asking them to choose between various proposed time periods, a Doodle poll, or a when2meet poll. In all those cases, you then comb through the received data and decide based on them what the best time is for everyone. Overall, even with the help of tools like Doodle and when2meet, this is a time-consuming and often frustrating process.
What if I told you there was a better way and it's available to you right now in Microsoft Outlook?
Scheduling Polls is a way to do just that. This feature is built-in to every version of Outlook and in this week's Microsoft in Minutes, I'll show you the ways you can use this feature to minimize the back-and-forth between attendees and organizers and to automatically schedule meetings based on poll responses.
How to create a scheduling poll
Scheduling Polls are tied to Outlook events, so to begin creating a poll using the Scheduling Polls feature in Outlook, simply create a new appointment or meeting via the Outlook Calendar.
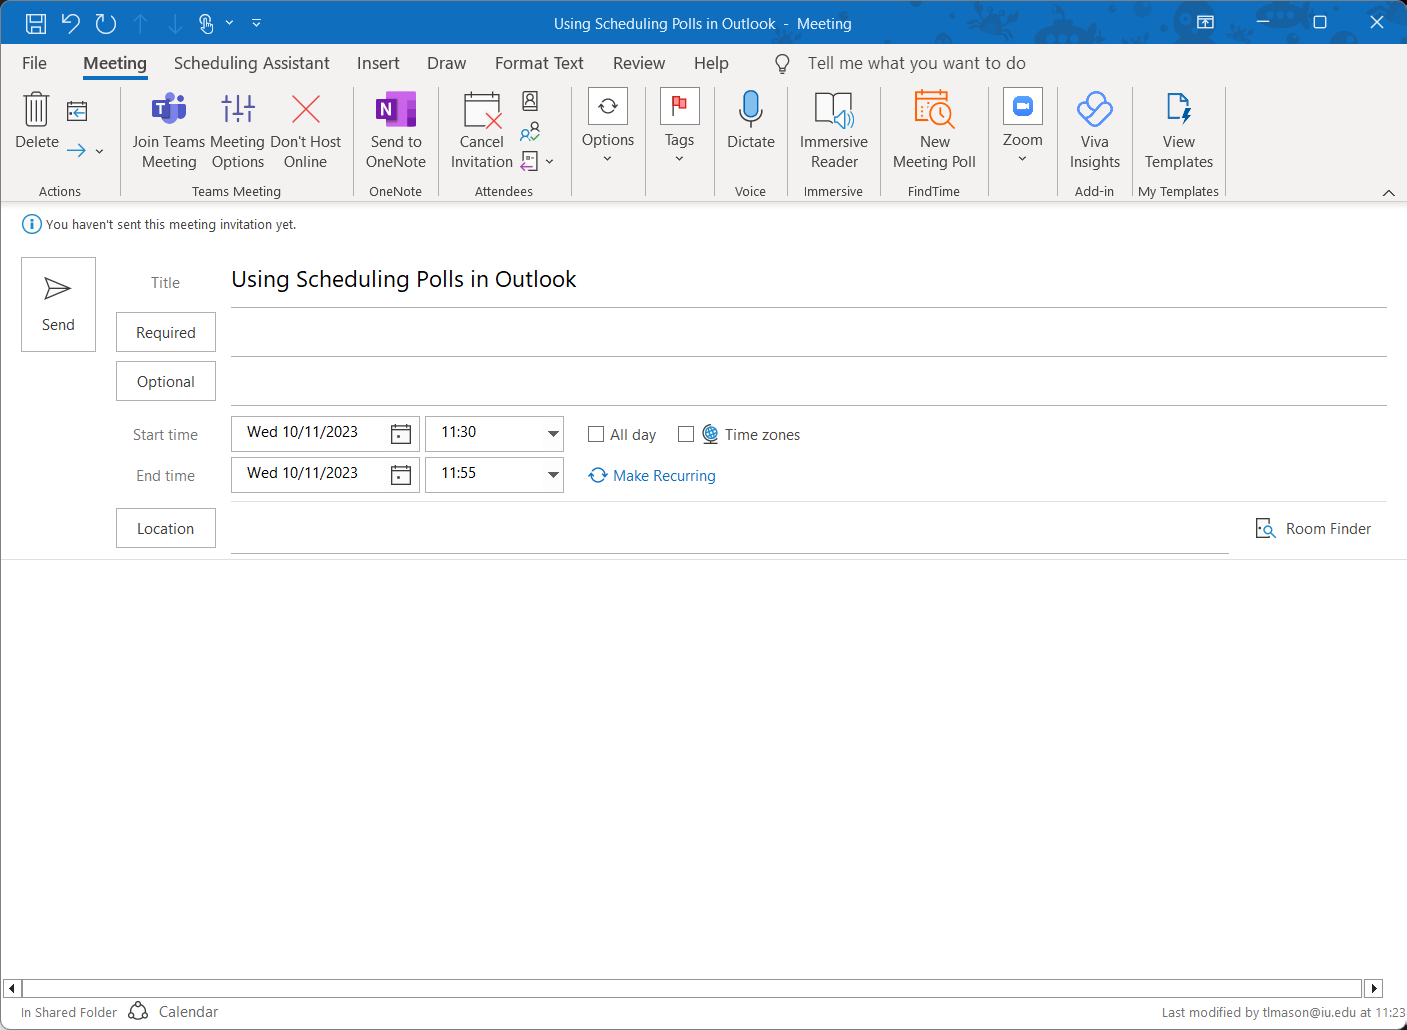
Next, let's add some attendees. For this example, I'll be using demonstration accounts, so there won't be very many attendees in the Required and Optional fields. You can also add anyone regardless of their affiliation with IU, simply add their email address.
Once you've added some attendees, you're ready to craft your poll. To craft your poll, click the New Meeting Poll button on the ribbon.
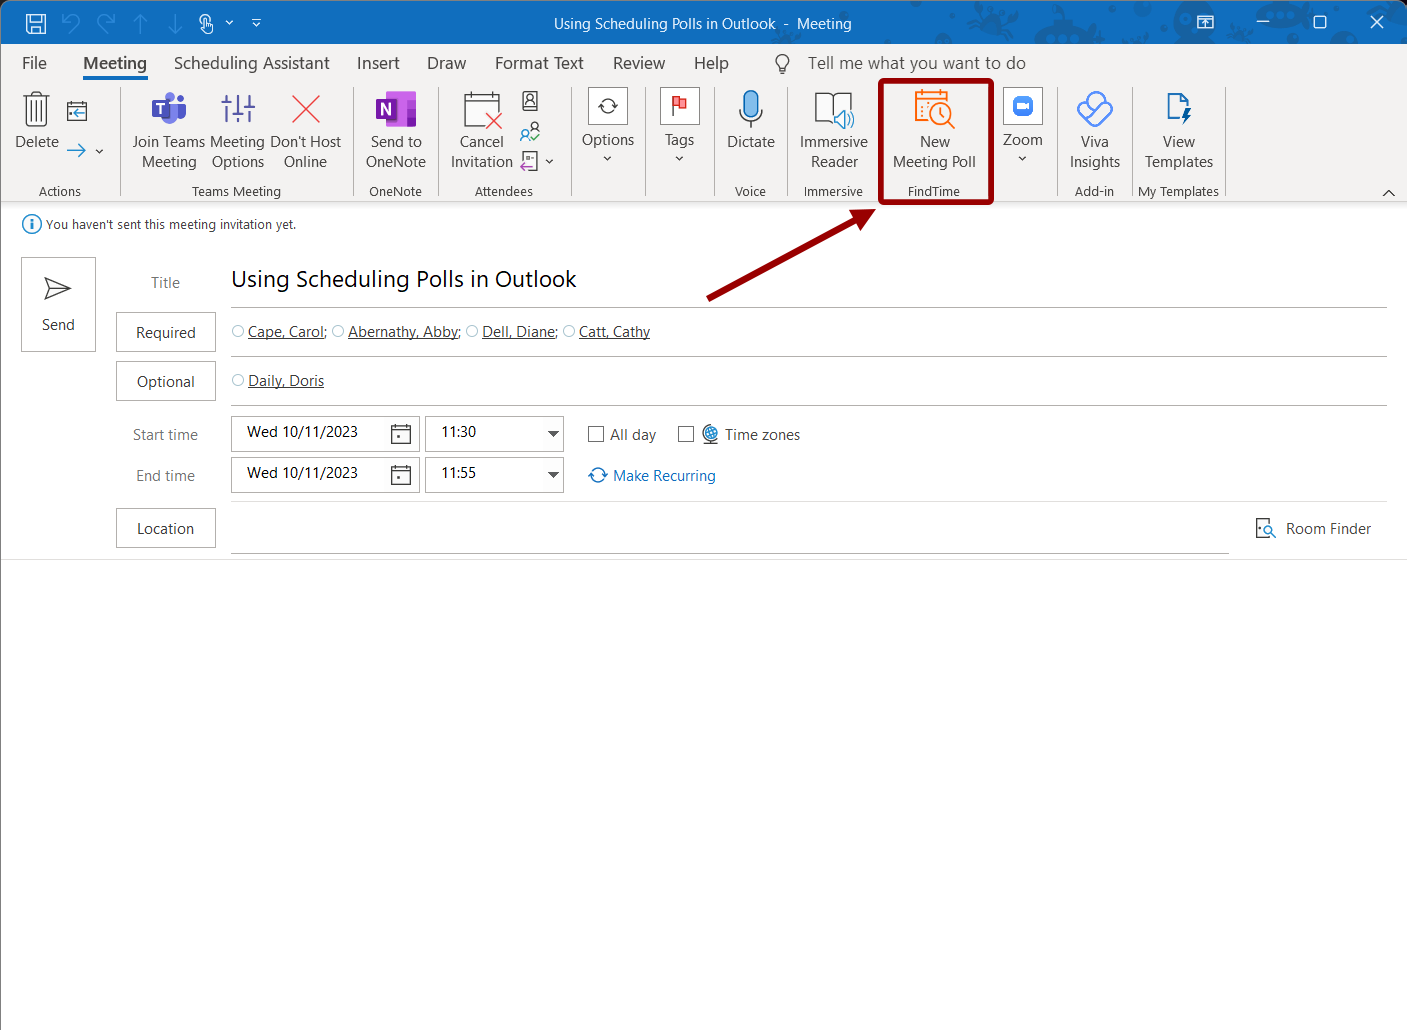
This opens the FindTime sidebar in your meeting invite:
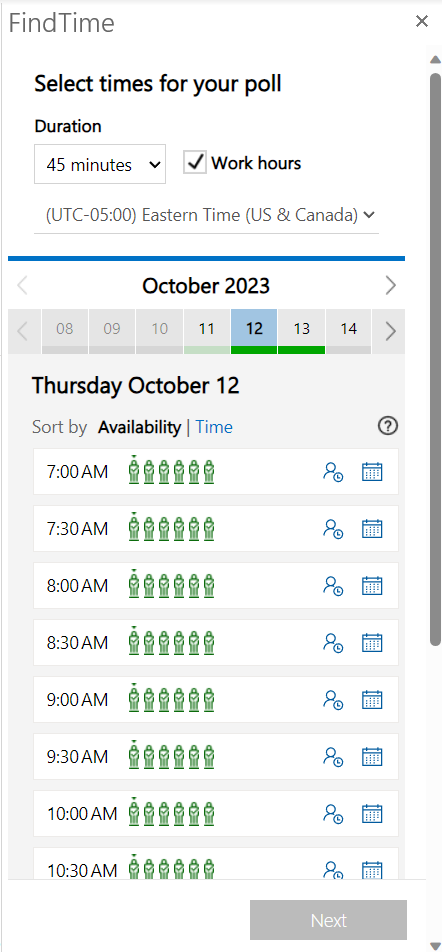
This is where the planning work begins. FindTime will look at calendars that it can access (e.g. calendars for which you have permission to view free/busy time within IU's Microsoft 365 tenant) and compare availability to what is set by default in the meeting invite. In our scenario, let's look for a few times in early November for our attendees to choose from.
To change the date and duration, simply adjust the fields in the FindTime sidebar to match what your event requires. In this scenario, I set the meeting to look for four hours on November 14th. As you can see, FindTime will show me what availability each person in the invite field has for that day:
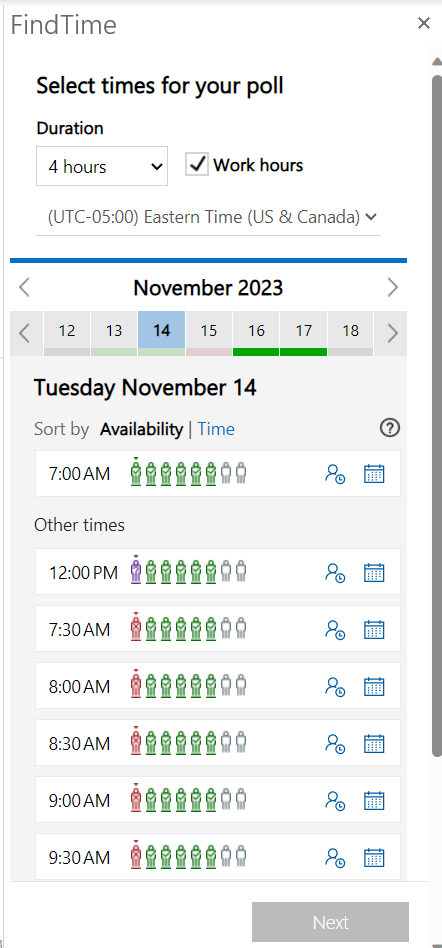
The difference in icons here indicates differences in availability. Little green people with check marks indicate that that individual is available, little purple people with question marks indicate that that person has a tentative appointment or is out of the office at that time, little red people with an X indicate that that person is unavailable, and little gray people indicate that Outlook can't discern the person's availability. When Outlook can't discern someone's availability, either that person has blocked your ability to see their calendar or they're using a system that is external to IU's Microsoft 365 tenant.
The next step is to select a few times that you'd like to propose to your attendees:
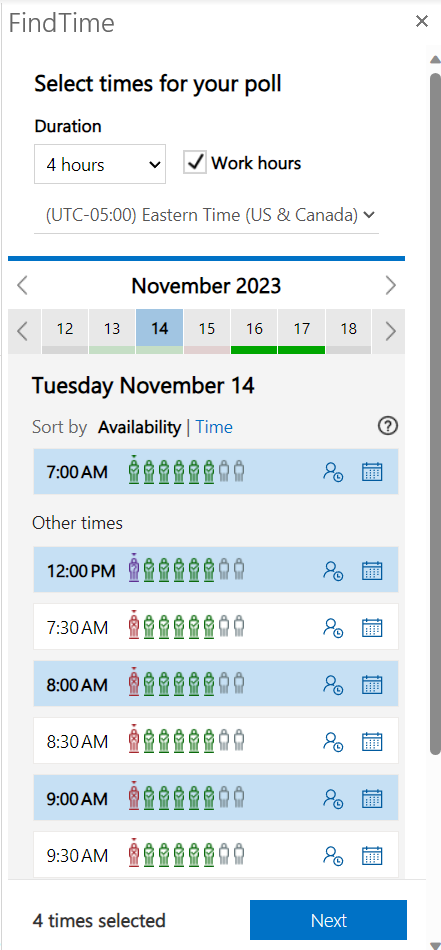
NOTE: You can select as many date/time combinations as you would like to provide your attendees with as many options as possible. In this example, I'm limiting the scope to a single day for simplicity.
In this case, I've selected four times on a single day for simplicity's sake, but you can select as many as you would like on as many days as you would like. Once you're finished making selections, click the Next button to continue. The next screen shows us the settings for the poll:
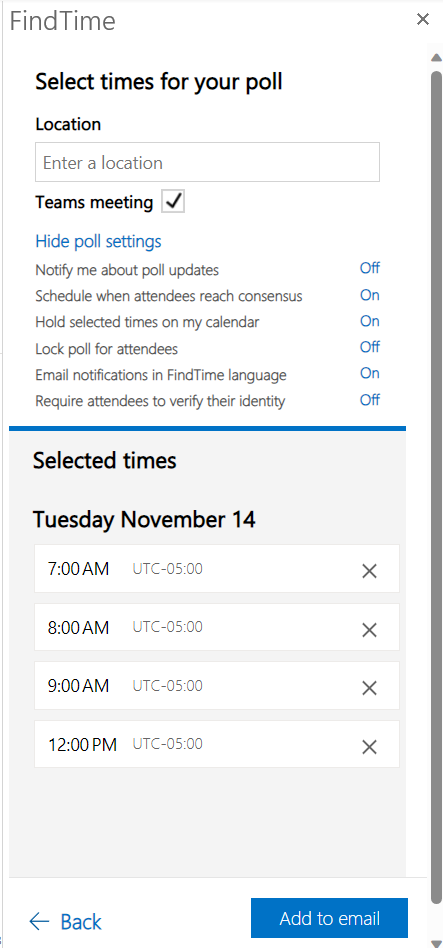
Each of the options at the top of the screen can be toggled on or off by clicking the word "On" or "Off" next to the option. The following explains the "On" behavior for each of the options:
- Notify me about poll updates–You will receive an email notification every time someone answers the poll.
- Schedule when attendees reach consensus–A calendar event is automatically emailed once all required attendees have voted. If multiple options are available, the earliest option is selected.
- Hold selected times on my calendar–Places tentative appointments on your calendar (not attendees' calendars) until the event is scheduled. Once the event is scheduled, all holds are removed from your calendar.
- Lock poll for attendees–Attendees will not be able to suggest new times or add other attendees to the poll.
- Email notifications in FindTime language–This will send email notifications in the language you are using when creating a Scheduling Polls. If this option is "Off," notifications will be in English.
- Require attendees to verify their identity–Requires attendees authenticate to Microsoft 365 before voting. If a particular attendee doesn't have a Microsoft account associated with their email address, they will be prompted to create one (this should only be the case for non-IU attendees).
Once you're finished, click "Add to email." When you add a schedule poll to an email, you will be prompted to close the calendar invite you were working with and to send the email that Outlook created and opened in another window:
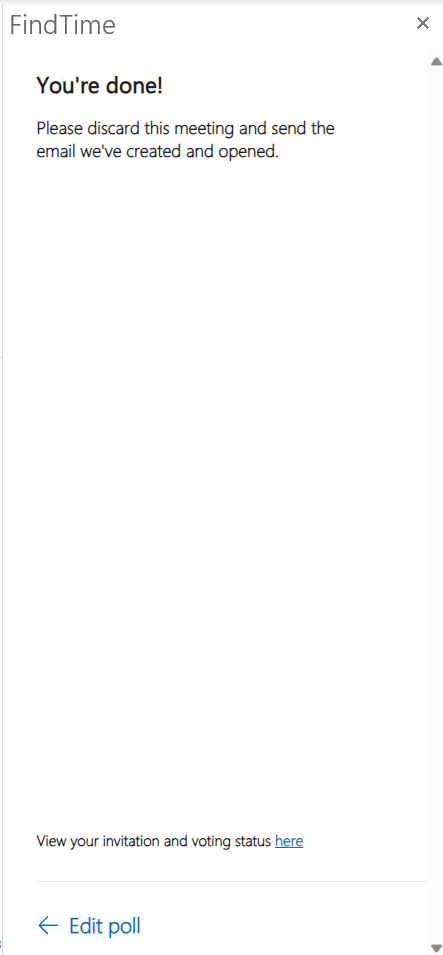
Scheduling Polls are sent to users via email. It's generally a good idea to include an explanation about what the meeting is for and ask attendees to vote by clicking the hyperlink in the "When" field of the poll table to vote for a time that works for them.
An example of that email is shown below:
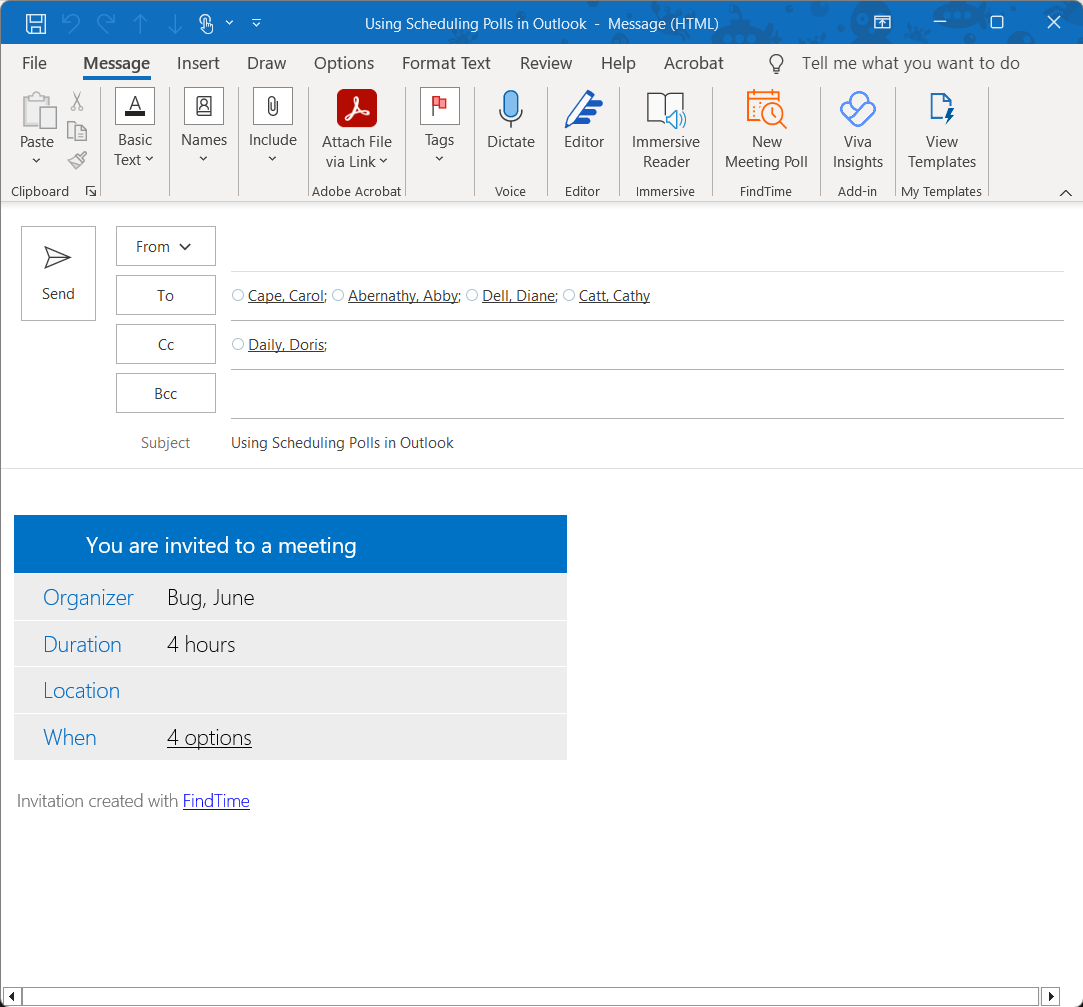
At this point, your work is complete! Grab a coffee and continue with your day while your attendees vote on which times work best for them. If you turn on the "Schedule when attendees reach consensus" option, your attendees will receive a calendar invite from you when a consensus is reached. If you turned on the "Hold selected times on my calendar" option, you will see temporary meetings in all the selected time slots on your calendar and, if you turned on the consensus option, they would disappear when a consensus is reached.

